


NANANINO Magnetic Charging Dock for Switch 2 Joy-Cons (4-in-1 fast charger, wall mount & RGB)
Product description
Key takeaways
If you want your Switch 2 accessories to be ready at a moment’s notice, this NANANINO Magnetic Charging Dock is built around convenience: magnetic alignment for charging, a wall-mount option to keep cables under control, and RGB lighting to make it obvious what’s going on.
On paper, the appeal is clear—up to 4 Joy-Con 2 controllers can be snapped into place at once, with LED status indicators (red while charging, green when full). The “magnetic dock” idea also tends to feel nicer than constantly lining up connectors in a hurry. That said, it’s not a dock for everyone: if you only own one controller or you don’t care about charging stations, you may find it’s more of a lifestyle accessory than a must-have.
The essentials
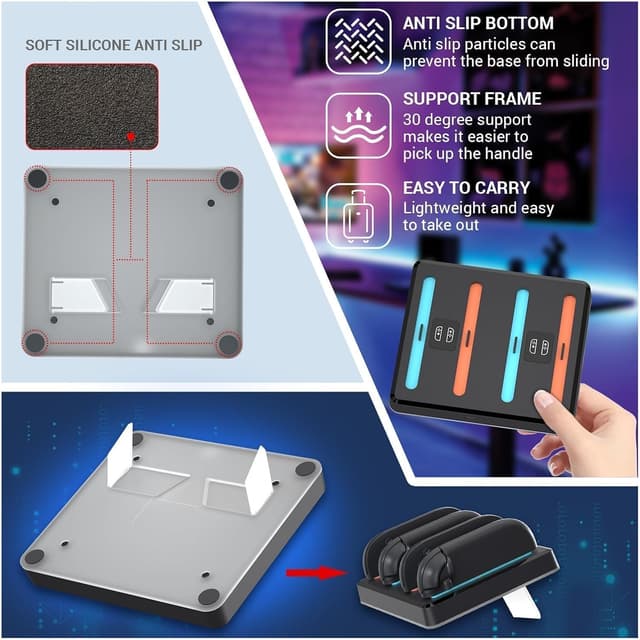
This is a USB-C powered charging station designed for Switch 2 accessories, specifically featuring a magnetic charging layout. The manufacturer’s pitch is fast charging and tidy organisation, and the dock includes a wall-mount design using nano-gel pads so you can attach it to walls or desks.
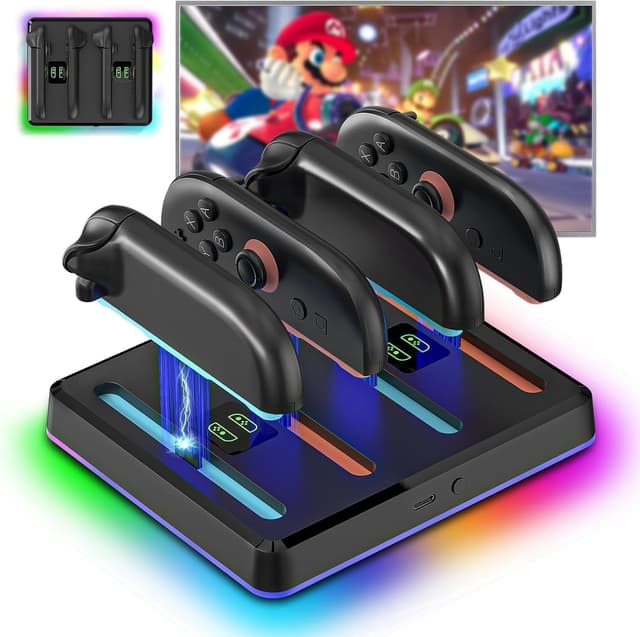
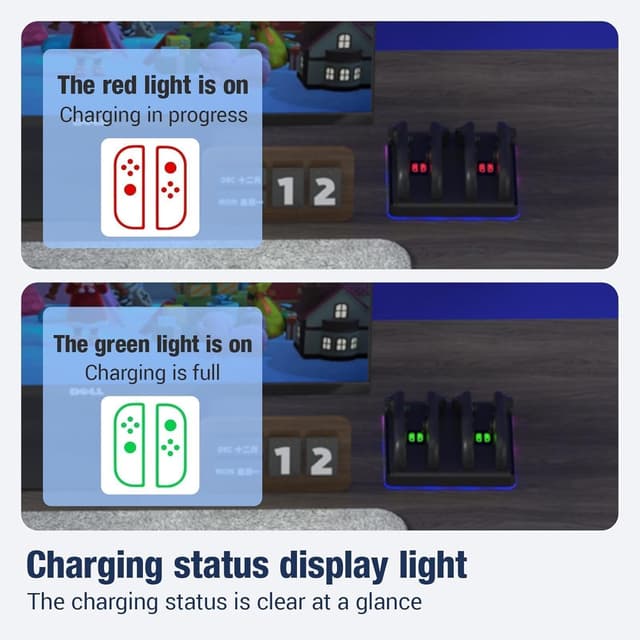
A quick scenario: say you’ve got a multiplayer session lined up. Instead of hunting cables and checking whether controllers are charged, you can place multiple controllers onto the dock in one go. When you glance at the LEDs, you get immediate feedback—red to indicate charging, then solid green once full.
What stands out day to day
A big part of the value here is the combination of alignment + visibility. Magnetic snapping can reduce fumbling, and the charging indicator system helps you avoid guesswork.
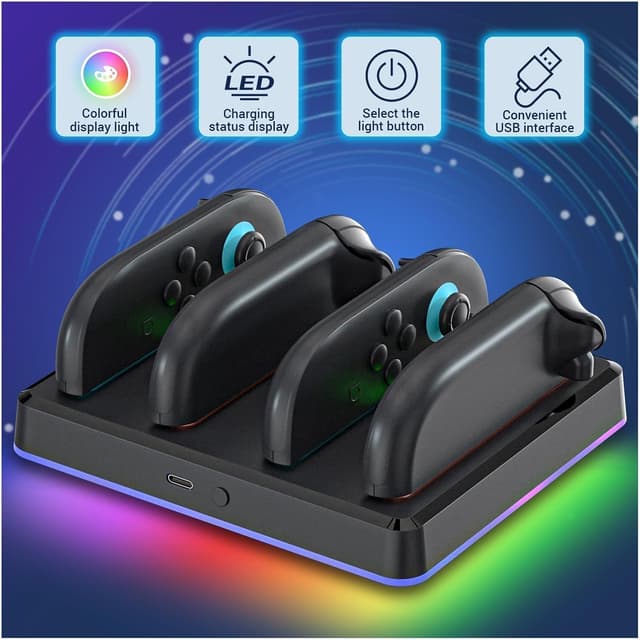
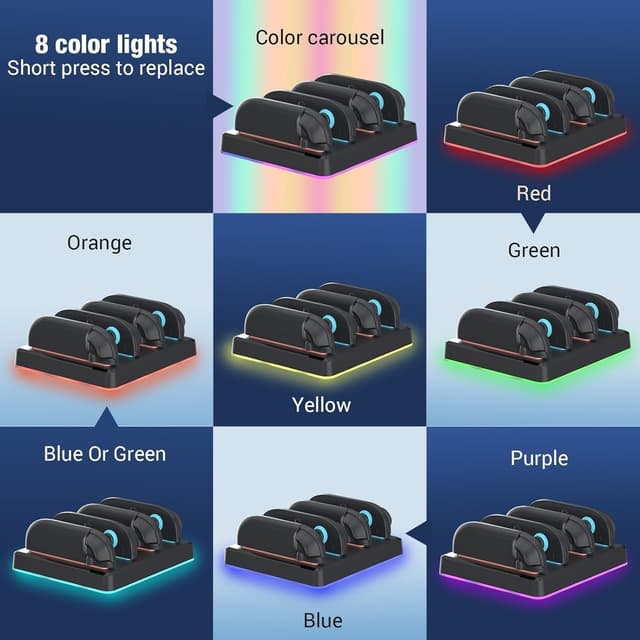
You also get 9 RGB light modes, described as 7 solid colours and 2 breathing modes, plus an LED indicator that changes colour based on charging status. If you’re the sort of person who likes a set-up that looks intentional, it’s one of the more distinctive features of this dock. If you’re sensitive to lighting in the room, it’s still worth considering whether you’ll actually enjoy the effects.
Pros
- Magnetic alignment is designed to make it easier to place multiple controllers on the dock.
- Up to 4 Joy-Con 2 controllers can be charged simultaneously.
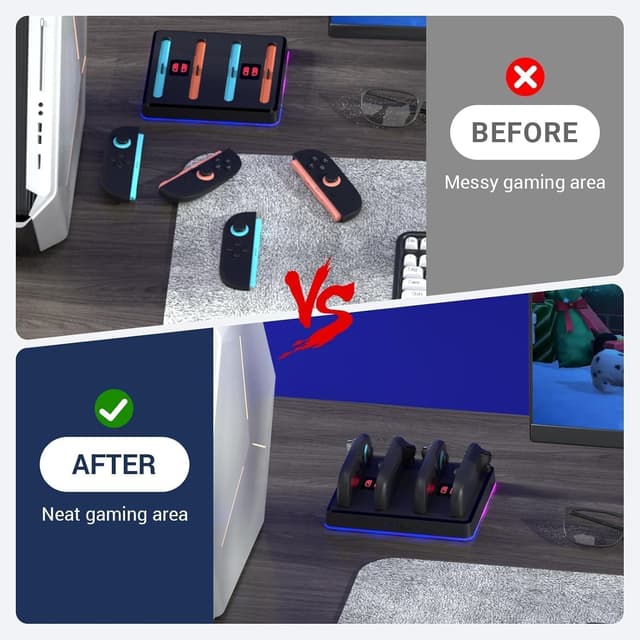
- Wall-mount option using nano-gel pads can help keep your desk neater.
- LED indicators show charging vs fully charged at a glance.
- RGB lighting modes add visual control over the setup.
- Includes safety features such as overcharge/overheating/short-circuit protection and auto-shutdown once full.
What to watch out for
This model is engineered for the Switch 2 (not an all-console dock), so compatibility outside its intended accessory category isn’t something you should assume.
Also, the “full charge in just 90 minutes” claim is helpful, but real-world charge time can depend on the accessory condition and power delivery from your USB-C source. If you’re expecting consistently identical timing no matter what charger you use, it’s smart to keep expectations grounded.
Finally, while the dock is described as drop-resistant with a polymer shell, it’s still a charging station—so treat it like one. If you regularly knock things around, you’ll want to mount it carefully or place it somewhere stable.
Tech specs
- Type: magnetic charging dock / charging station
- Charging capacity: designed for up to 4 Joy-Con 2 controllers at once
- Power input: USB-C powered (5V/1.5A)
- Charging time (claimed): full charge in about 90 minutes
- Charging indicators: pulses red while charging, solid green when fully charged
- RGB lighting: 9 modes (7 solid colours and 2 breathing modes)
- Safety features: smart chip protection against overcharging, overheating and short-circuits, auto-shutdown once fully charged, discreet buzzer alert
- Mounting: wall or desk mounting using nano-gel pads
- Build: rugged polymer shell, described as drop-resistant
Who it suits (and who should skip it)
It makes sense if you want a dedicated, space-saving charging routine for multiple Switch 2 controllers, especially if you host friends or regularly swap between different players.
It may not be the best match if you mostly charge one controller at a time, if your main priority is charging speed above all else (with no need for docking), or if you’d rather keep your setup minimal and don’t want RGB effects.
Is it worth it?
Buy the NANANINO Magnetic Charging Dock if you value magnetic “snap-in” placement, want the red/green status indicators for instant charging visibility, and prefer a wall/desk mounting approach to keep cables tidy—particularly if you own multiple Joy-Con 2 controllers and want to charge them together.
Skip it if you’re only looking for a simple single-controller charger, if you’re not committed to a dock-based charging routine, or if you’re concerned about how much lighting (RGB) you’ll tolerate in your space.
Either way, before buying, it’s worth double-checking that your accessory set aligns with the Switch 2 Joy-Con 2 dock focus described here, and that you’re happy with charging via a standard USB-C port at the stated input (5V/1.5A).
Quick FAQs
FAQ: Is this dock powered by USB-C?
Yes, it’s described as USB-C powered using a standard USB-C port.
FAQ: Does it charge multiple controllers at once?
The dock is described as able to charge up to 4 Joy-Con 2 controllers simultaneously.
FAQ: What do the LED lights indicate?
The LED indicator pulses red while charging and switches to solid green when fully charged.
FAQ: Can it be mounted on a wall?
It includes a wall-mount design using nano-gel pads for attaching to walls or desks.
FAQ: Does it have safety protection?
It’s described as including a smart chip for protection against overcharging, overheating and short-circuits, plus auto-shutdown once fully charged and a buzzer alert.