

Bemece Portable 100% Blackout Blind (No Drill) for Windows – 420D Oxford Blackout, Cut-to-Fit, Velcro & Adhesive
Product description
What it is and why people buy it
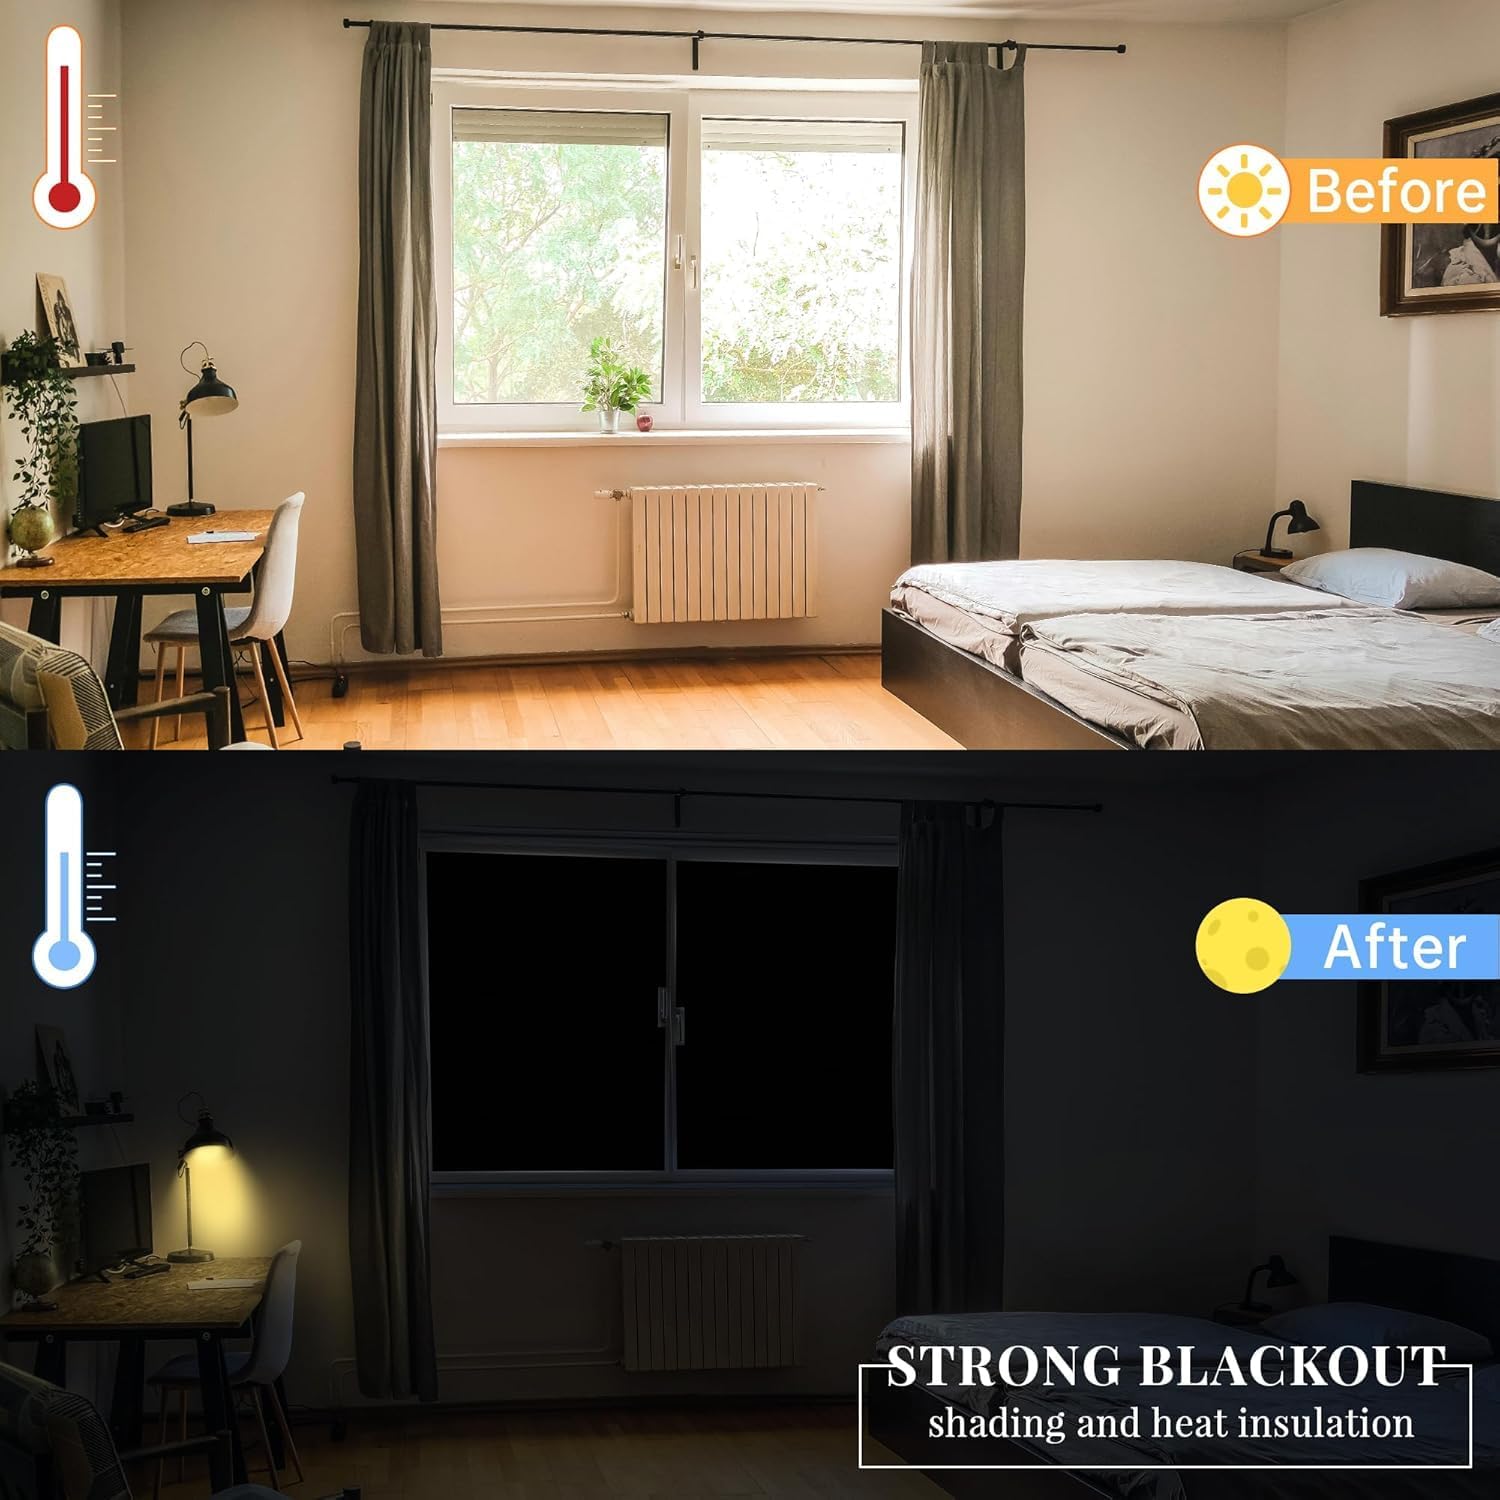
If your room gets too much morning sun (or your sleep schedule is more “night-time” than “standard”), a blackout blind can make a surprisingly big difference. The Bemece Portable 100% Blackout Blind is designed to block sunlight and UV, using a thick blackout fabric with a reflective-coated backing. The key selling point here is that it’s a no-drill solution for windows, so you can fit it without tools and without permanently fixing anything.
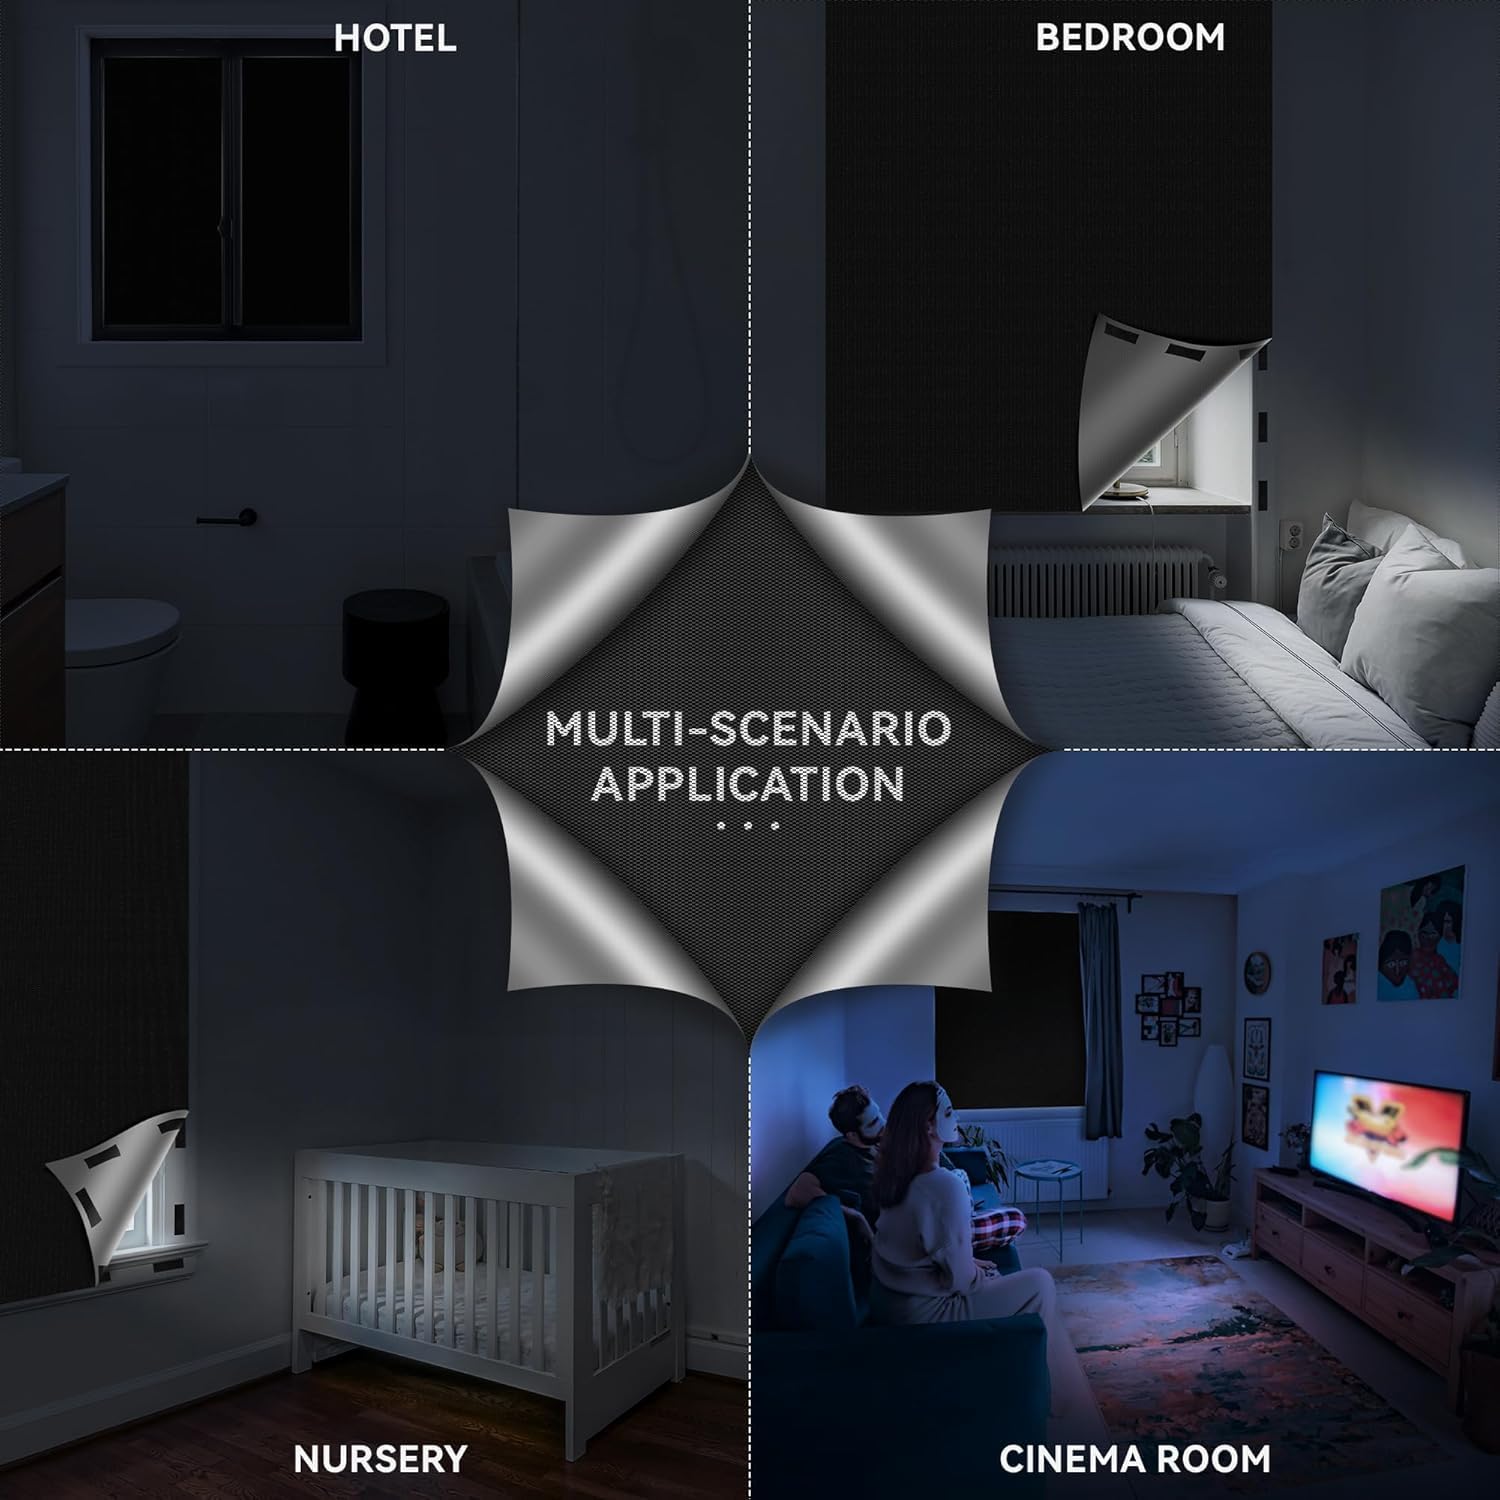
On paper, it’s the kind of product you reach for when you want a darker room quickly—think bedroom, nursery, loft space, RV/campervan, or even a home office that needs less glare. It’s also cut-to-fit, which helps when your window isn’t a perfect rectangle (or when you simply want a snug, no-gaps layout).
That said, it’s not a “set and forget” blind for every household. If your priority is a perfectly measured, no-touch installation on day one, you may find the DIY cutting step a little fiddly. And if you want it to adhere directly to glass, you’ll need to plan differently because the guidance is to avoid sticking to the glass itself.
Where it fits in (and what you should expect)
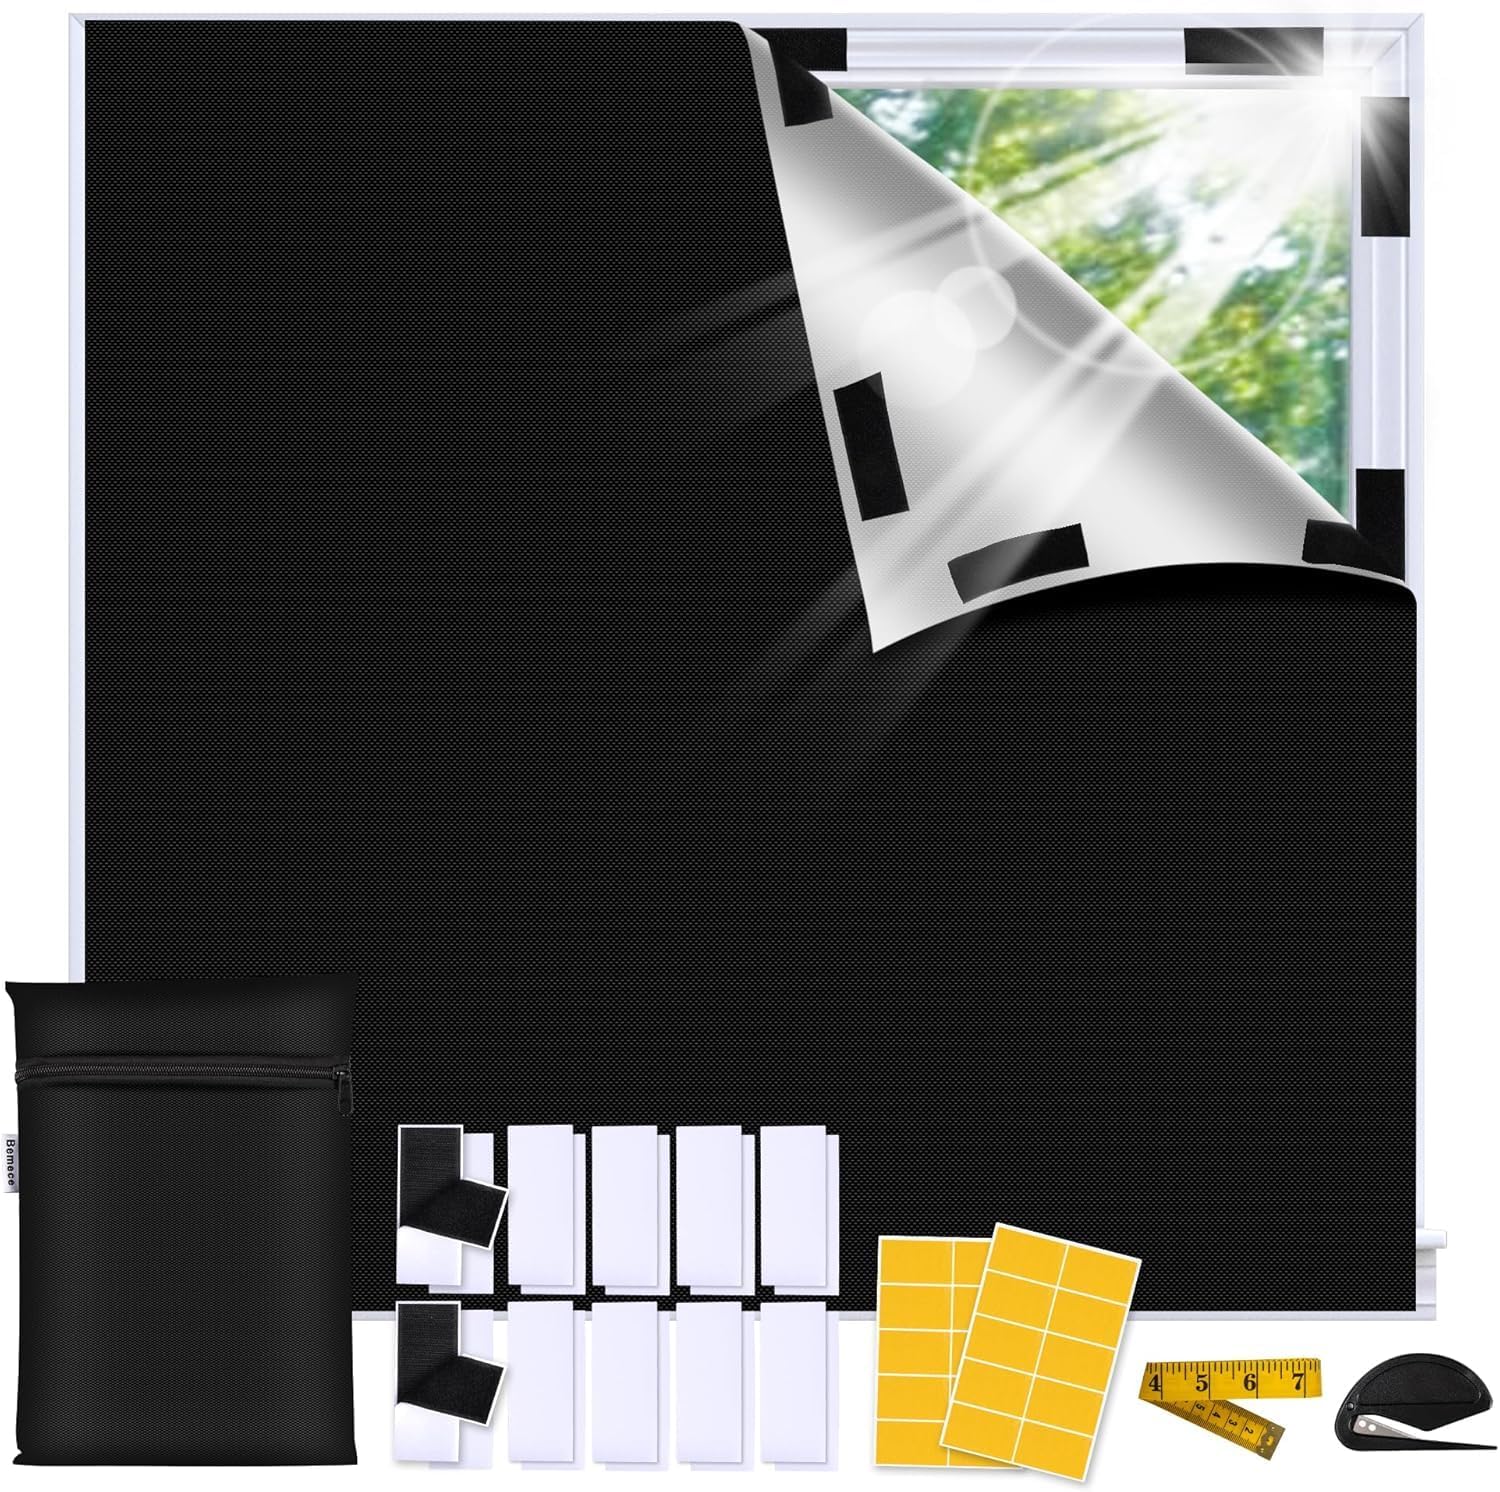
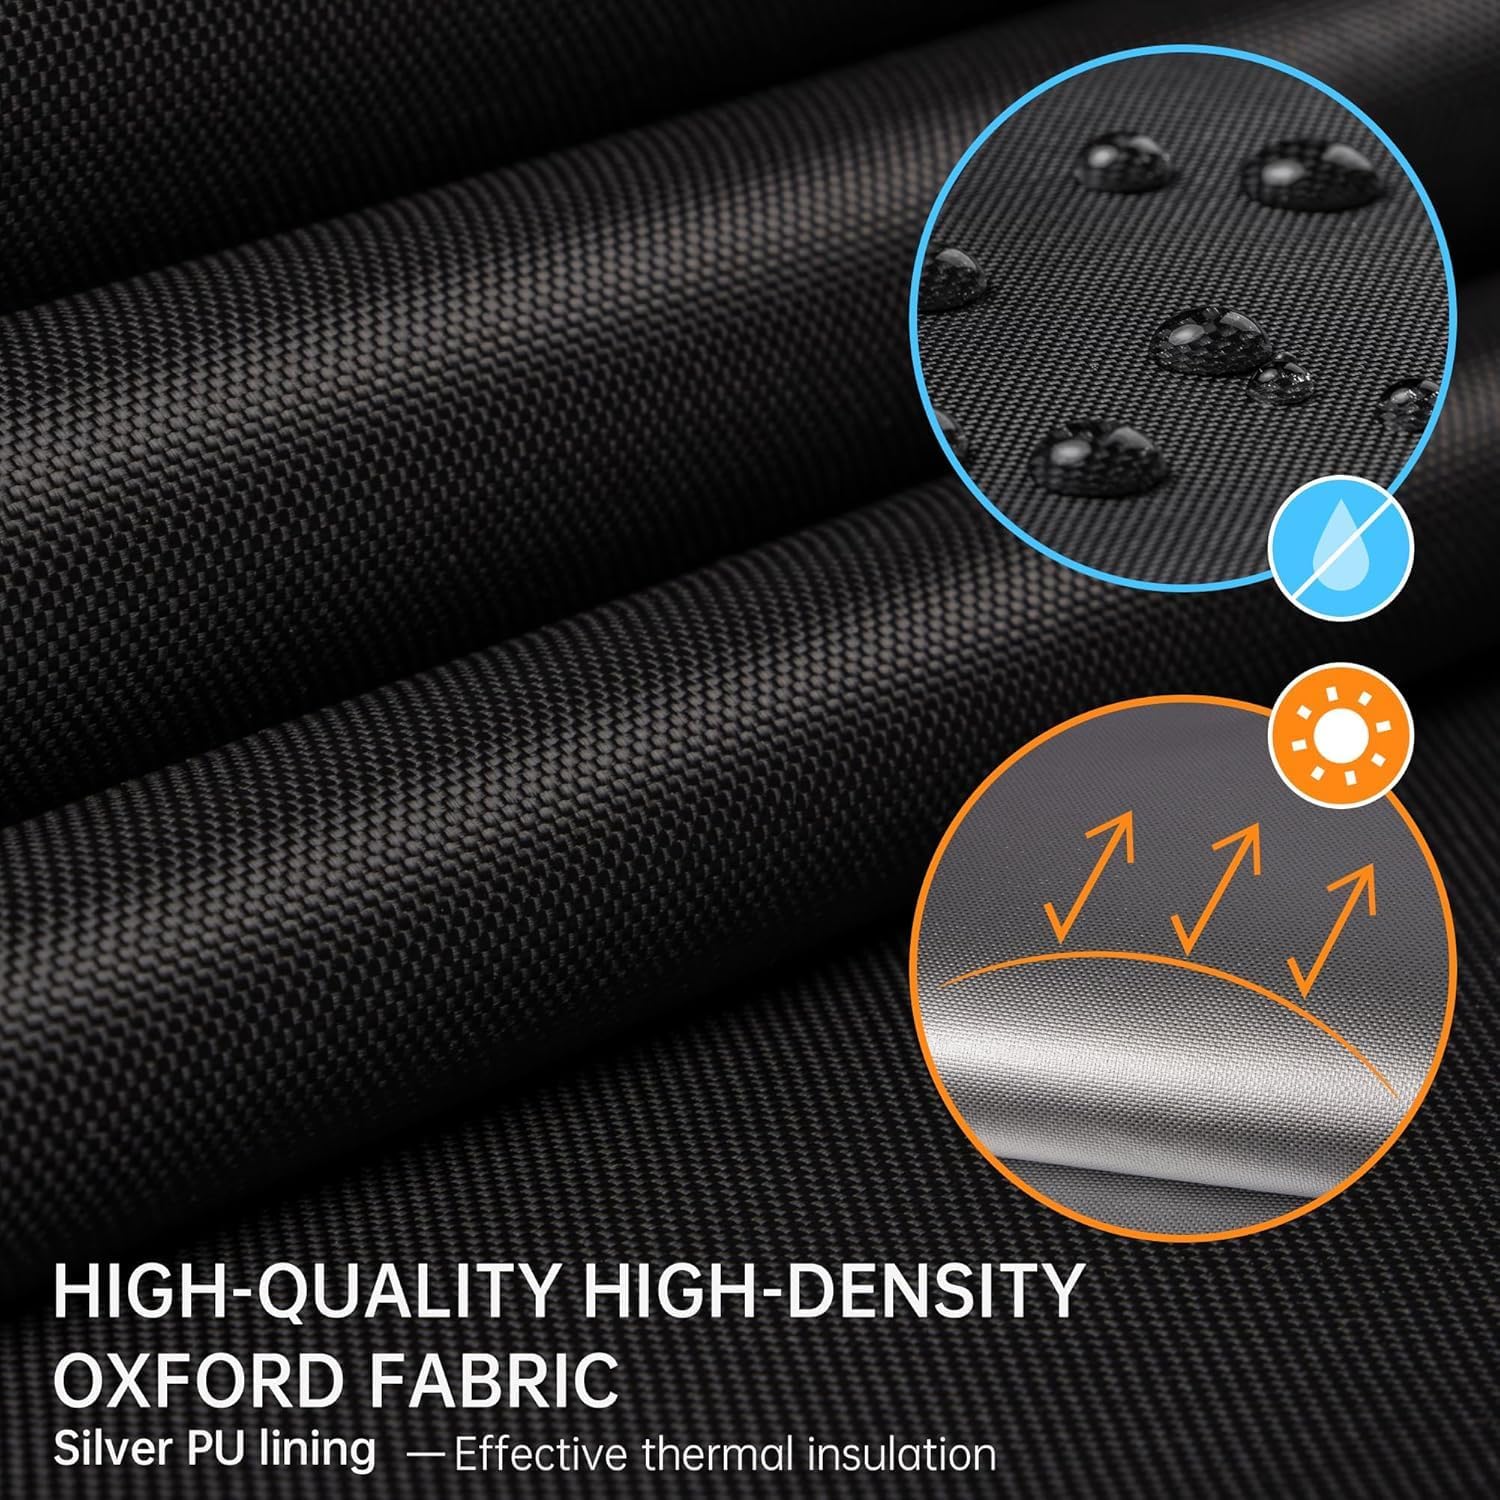
This blind positions itself as a practical blackout cover rather than a fully rigid, hard-mounted roller system. The fabric is described as thickened 420D Oxford cloth, with a thick PU silver coating on the back. Together, those materials are intended to block light and UV rays and help the blind sit close to the window for a more light-free indoor space.
In real-world buying terms, you should expect: - Noticeably less daylight in the room when the blind is properly cut and secured. - A solution that’s portable and easy to remove, since the installer kit uses removable adhesives and included tape/fastening options. - Some user input required—measuring, cutting, and aligning it so light can’t sneak around the edges.
If you’ve used simpler covers before, the “thicker fabric + coated backing” approach is the part that usually makes the bigger difference. If you’re dealing with harsh direct sun, the fit (and how you attach the edges) will matter as much as the material.
Key takeaways (installation approach)
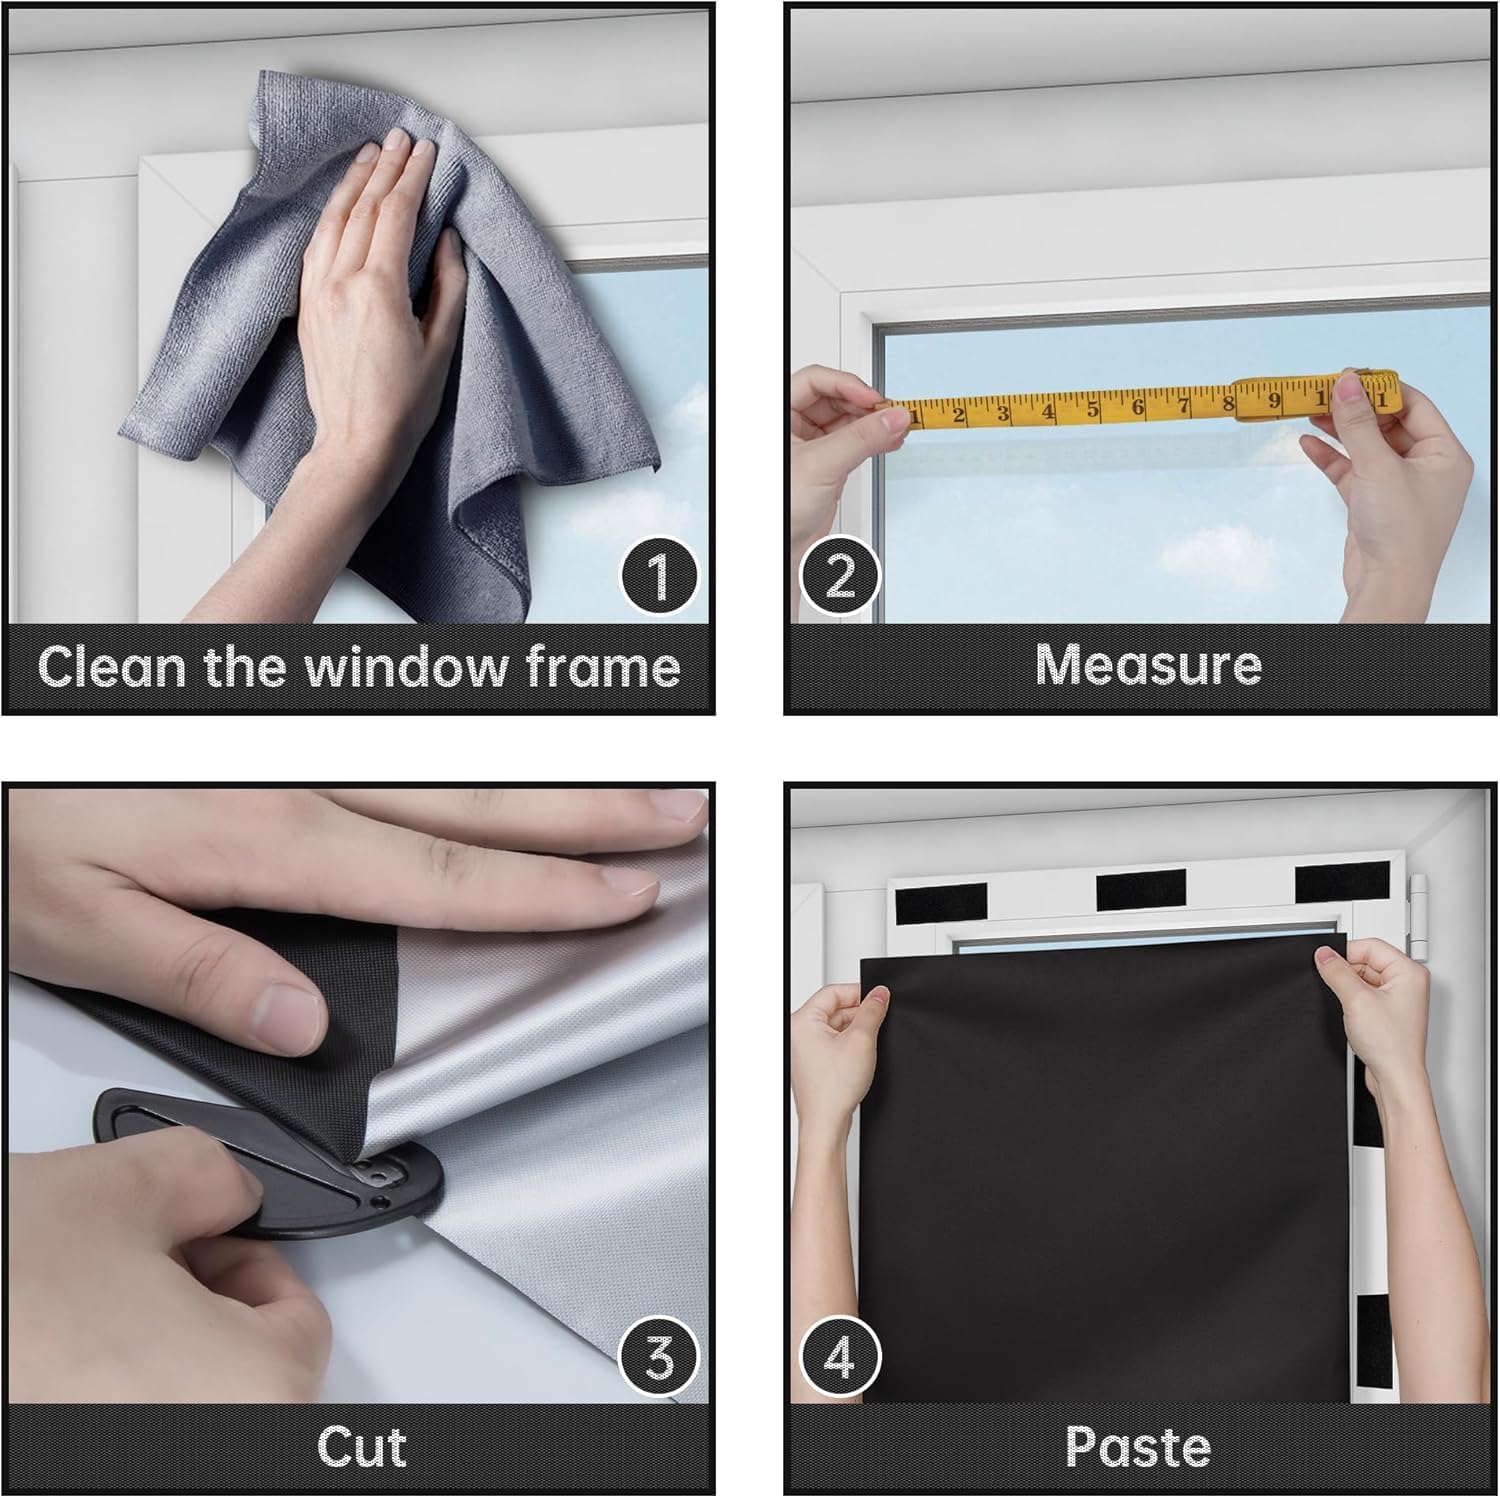
The no-drill angle is built around two fastening methods included in the pack: 20 pairs of magic tapes (as described) and 20 pairs of powerful double-sided adhesives. The idea is simple: measure, cut, and connect.
A few practical notes that matter when you’re deciding: - It’s recommended to make the cut size slightly larger than your actual requirement for a better light-blocking effect. That can help reduce light gaps, but it also means you shouldn’t cut too aggressively at first. - The instructions recommend attaching the Velcro to the window frame for use, and they specifically say not to stick it directly on the glass. - The adhesives are described as easily removable and leaving no residue, which is reassuring if you’re renting or you just don’t want to risk marks.
If you’re the sort of person who hates drilling and drilling tools, this will feel more “instant” than many traditional options. If you’re after something you can put up in under a couple of minutes with zero measuring, you may find it takes a little longer than you hoped.
Cutting-to-fit: how it works in daily life
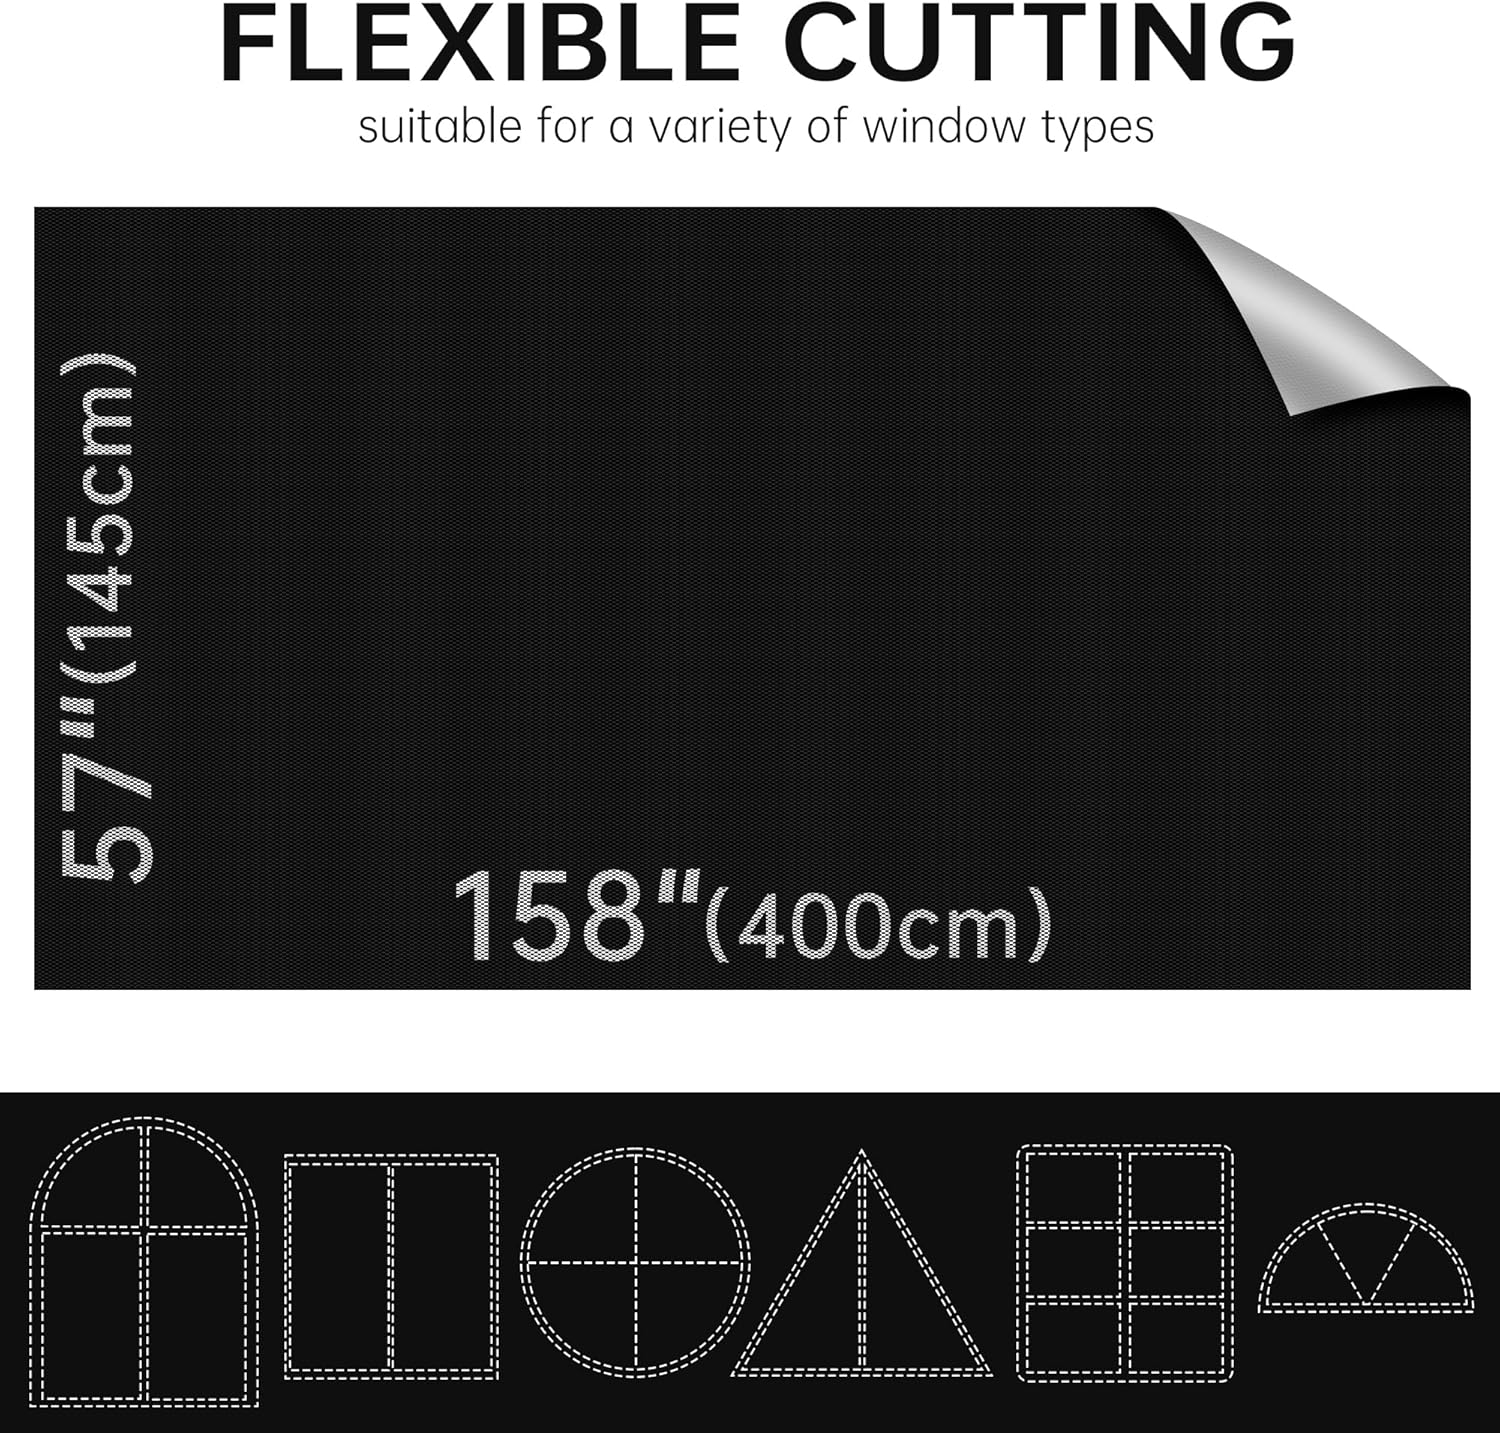
The blind is sized at 400 × 145 (as provided) and is described as fitting a wide range of windows. What sets it apart is that it’s meant to be DIY-cut to match your window shape.
The pack includes a cutter, and the guidance is to cut the blackout cover to your desired shape and size. For best light blocking, you’re advised to cut the size slightly larger than needed.
A realistic micro-scenario: imagine you’re fitting it in a nursery. You measure the window opening, mark the fabric, and use the included cutter to shape it. Before attaching everything, you test the fit around the frame so it closes neatly without obvious gaps. Then you secure the edge points with the included tapes/adhesives. Once the blind is aligned and the edges sit close, you’ll typically notice the room brightens far less when the sun hits.
One limitation to bear in mind: because it’s cut-to-fit, precision matters. If your measurements are a bit off, you may either end up with edges that don’t align cleanly—or with a fit that’s too tight and harder to position.
What you’ll notice about the fabric and light blocking
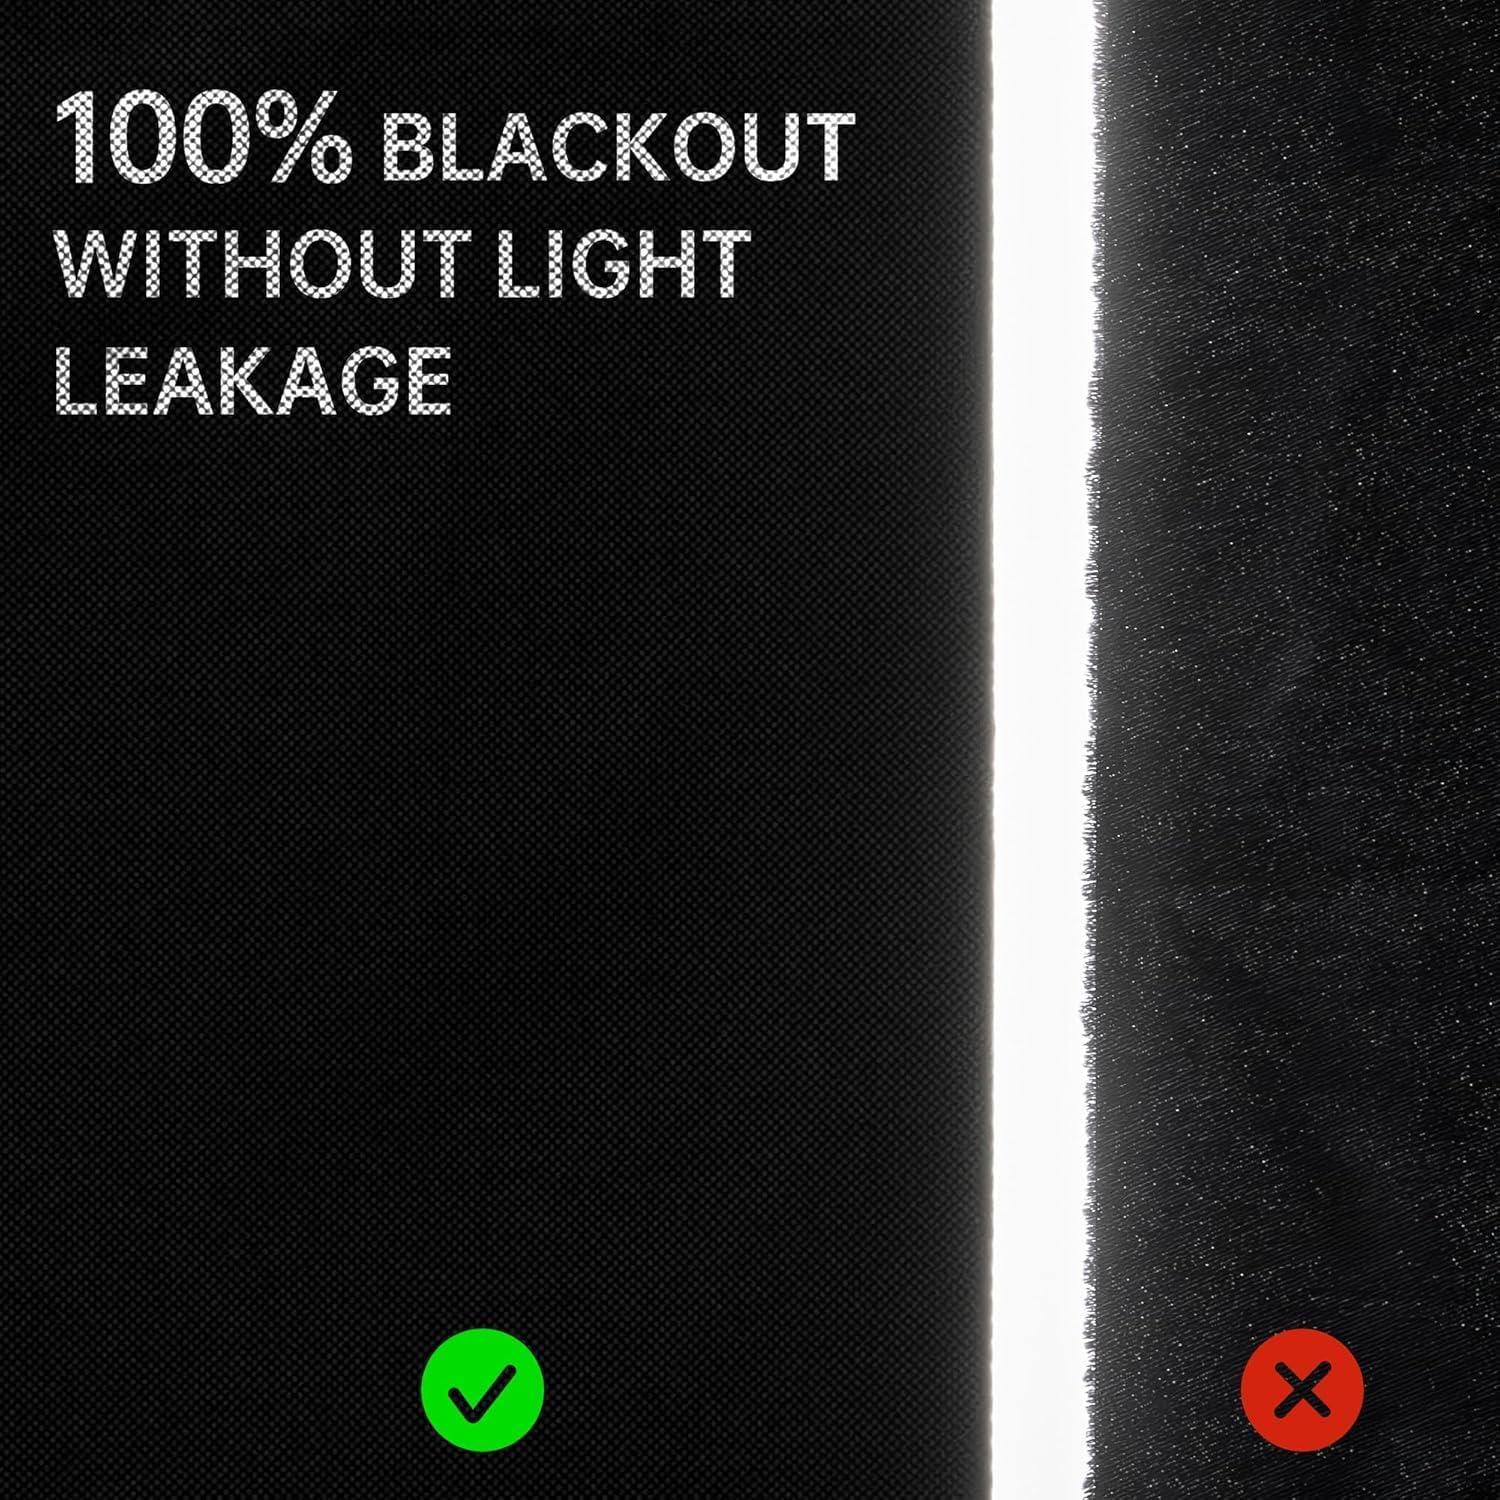
The blackout performance is attributed to: - Thickened 420D Oxford cloth - A thick PU silver coating on the back designed to block light and UV rays - A close window fit to create a lighter-free indoor space
Creases can happen with blackout covers, especially portable ones packed for shipping. The instructions suggest ironing the non-silver-plated side at a low temperature if you see creases.
It’s worth being honest about expectations: “100% blackout” is a strong claim, and in practice, any blackout setup can be affected by how well it seals around the edges. With this blind, the edge attachment method (Velcro to frame, not glass, adhesives/tapes where needed) and your cut size are likely to be the biggest factors.
Limitations and things to double-check before buying
Before you commit, check these points so you’re not surprised: - It must be attached in a way that follows the guidance: Velcro should be attached to the window frame, and you should not stick it directly on the glass. - The pack size is listed as 400 × 145, so make sure it can be cut to cover your target window area with acceptable overlap. - You’ll need space and time for measuring and cutting. The included cutter helps, but it’s still DIY. - If your window has an unusual frame setup or you’re unsure where you can secure tapes/adhesives, you may need to think through placement before starting.
If you’re expecting a plug-and-play blackout without measurement or cutting, this may feel like more work than you want. It’s better suited to buyers who don’t mind doing a bit of setup to get a darker room.
Care & portability (and why that matters)
The blind is described as portable, and a dedicated storage pouch is provided for easier carrying during outings. That’s particularly relevant if you’re using it in an RV/campervan or you want to move it between rooms.
For looks and fit after unboxing: if you notice creases, the instructions say you can iron the non-silver-plated side at a low temperature.
Pros and potential drawbacks
The main strengths are fairly clear from the way it’s designed: - No drilling required, with removable adhesives and included fastening options. - Thick blackout fabric with a PU silver-coated backing intended to block light and UV. - Cut-to-fit approach using the included cutter, making it flexible for different window shapes. - Practical for bedrooms and also for RV/campervan or loft-style spaces.
Where it can fall short for some people: - You’re relying on DIY cutting and edge sealing, so it may not reach the same “perfect blackout” you’d expect from a fully engineered, perfectly fitted system. - If you dislike measuring and shaping, it might feel like extra effort.
Is it worth it?
Worth considering if you want a portable, no-drill blackout solution for windows and you’re happy to measure, cut, and secure the edges to reduce light gaps. It particularly makes sense for bedrooms, nurseries, lofts, and use in an RV/campervan where drilling isn’t ideal.
Better avoided if you need a quick, tool-free install with no cutting, or if you’re set on sticking directly to glass (the guidance here is not to do that). Also consider looking elsewhere if your window frame layout makes it hard to attach Velcro or if you don’t have a comfortable way to position and align the cut edges.
Mini FAQ ## Will it be easy to install? It’s designed for no-drill installation: measure, cut, then connect using the included magic tapes and double-sided adhesives.
## Can I cut it to match my window shape? Yes. The product is described as cut-to-fit, and a cutter is included so you can shape it to your window.
## Does it stick permanently? The adhesives are described as removable and leaving no residue, so you should be able to take it down without damaging surfaces.
## What if the blind arrives creased? The instructions suggest ironing the non-silver-plated side at a low temperature.
## Where should I attach the Velcro? The guidance is to attach the Velcro to the window frame, and not to stick it directly on the glass.